No Knead Focaccia
This post may contain affiliate links. Read the disclosure policy here.
This thick and fluffy focaccia is beautifully caramelized with generous amounts of olive oil. Great for sandwiches or serving along side your favorite Italian dish or salad. A favorite of family and friends, you’ll never try another focaccia better than this one.
The first time I remember making focaccia was with someone who had just finished culinary school. We were all working together preparing food for a friend’s welcome home party, and I was delighted for the experience of making food alongside someone who cared about food as much as I do (possibly even slightly more), and definitely had a lot more cooking knowledge than I did.
Among the other tricks I learned while cooking with a newly minted chef (did you know that you can more easily remove the skins from garlic if you soak the cloves in warm water?), I witnessed him making trays and trays of focaccia. I do not recall what recipe he used for the bread, only that I gaped as I watched him pour copious amounts of olive oil to coat the focaccia dough before and after baking. That focaccia had a beautifully caramelized crust on the bottom with bubbly soft and chewy dough. Each bite had flakey sea salt and fresh herbs, and left olive oil on my lips and fingertips. It was so good I don’t remember eating anything else at the party.
After consuming way too much focaccia that day, the lesson remained: be extremely generous with olive oil when you make focaccia. Years later, while examining the bubbles in some over proofed bread dough, I pondered if it would also make a good focaccia.
It took a little experimenting with baking temperature, but I figured out a way to make the perfect focaccia. I have made this recipe as a sandwich for friends many times. Some friends love the sandwich so much that they try focaccia at viral restaurants across the country, but they still say mine is better.
This recipe, plus another even easier focaccia recipe that I adapted have convinced me that pretty much any dough can be made into focaccia with enough olive oil.
Other reasons you’ll love this recipe:
The dough can be made in advance (frozen in between the first and second rise)
It only takes a few ingredients
Pairs wonderfully with pasta, a charcuterie board, lasagna, and alongside salad
Use extra dough as a beautifully chewy pizza crust
The perfect bread to make a mega sandwich
It’s very customizable. I sometimes keep the toppings simple with flakey sea salt, but if I have a little more extra time I add minced fresh garlic and fresh herbs. I have also seen people add toppings like sundried tomatoes, olives, jalapeños, and even sweet versions like a blueberry lemon or a cinnamon roll version (thinking I’ll need to try this out myself!).
How you can serve this recipe:
This is my favorite bread to use for a mega-sandwich when I host casual get togethers, like birthday parties for my daughters
When serving as a bread alongside salad or a larger meal, I cut into strips and place in a basket at the center of the table
Croutons: If I ever happen to have leftover focaccia that has gone a bit stale, quickly run it under water in the sink and microwave for 30 seconds to soften. Cut into 1” cubes and toast in some butter with salt in a frying pan until golden brown
Step By Step Instructions with Pictures
Yield: Makes one 9x13 or two 9x9 focaccias
Time: 6 1/2 hours start to finish
Storage: Leave on counter for the first 24 hours, then store in a plastic or sealable bag for up to three days
INGREDIENTS
500 Gr (3 3/4 c) all purpose flour
500 Gr (3 3/4 c) bread flour*
1 tsp instant yeast**
21 Gr salt (3 1/2 tsp)
720 gr (3 1/8) cup lukewarm water
1/2 cup olive oil, plus more as needed
4 teaspoon flakey sea salt
Other optional toppings: Fresh rosemary, minced garlic, olives, sundried tomatoes, etc.
*Can sub all-purpose flour if you don’t have bread flour
**If you only have active yeast, activate in 1 cup of the water you were planning to add to the dough)
Mix the dough: Use a food scale if you have one for the most accurate result. Whisk flours, salt, and yeast (unless you’re using active dry yeast, then activate it first) in a large bowl. Add water and mix with a fork, then when it’s mostly combined, wet your hand and use it to grab underneath the dough and mix until you can’t find any dry flour at the bottom. Wet your hand periodically to avoid dough from sticking to it.
Hydrolyze: Once it’s fully mixed, cover with a dry lint-free towel and let it hydrolyze for 25-30 minutes.
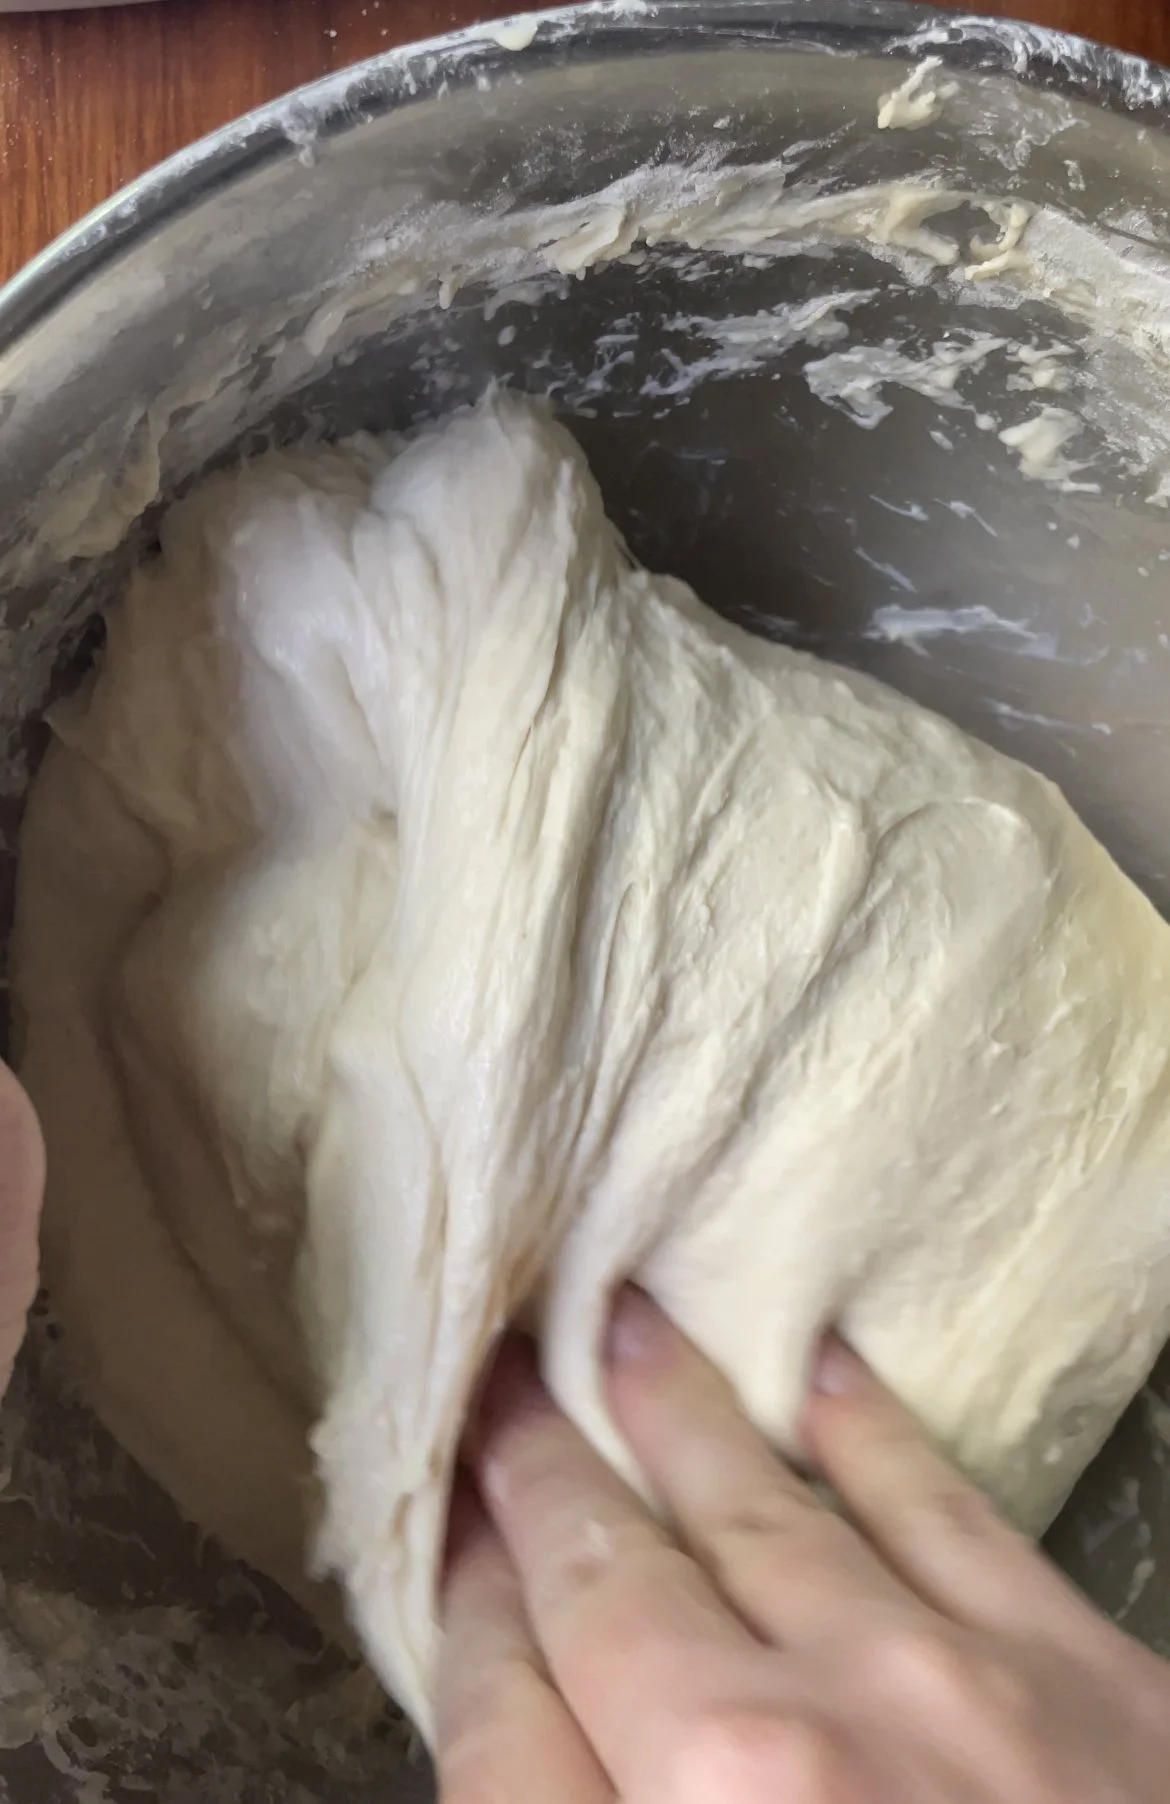
Fold: Now you will begin folding the dough to build tension. See the photos below, which illustrate the folds. Grab underneath the dough and pull to the opposite side of the bowl. Turn the bowl a quarter of the way clockwise and repeat three more times, turning the bowl after each fold. You will do a total of four folds. Cover with the dish towel in between rests.
Rest & Fold: Wait 5 minutes and fold.
Wait 10 more minutes and fold.
Wait 30 more minutes and fold.
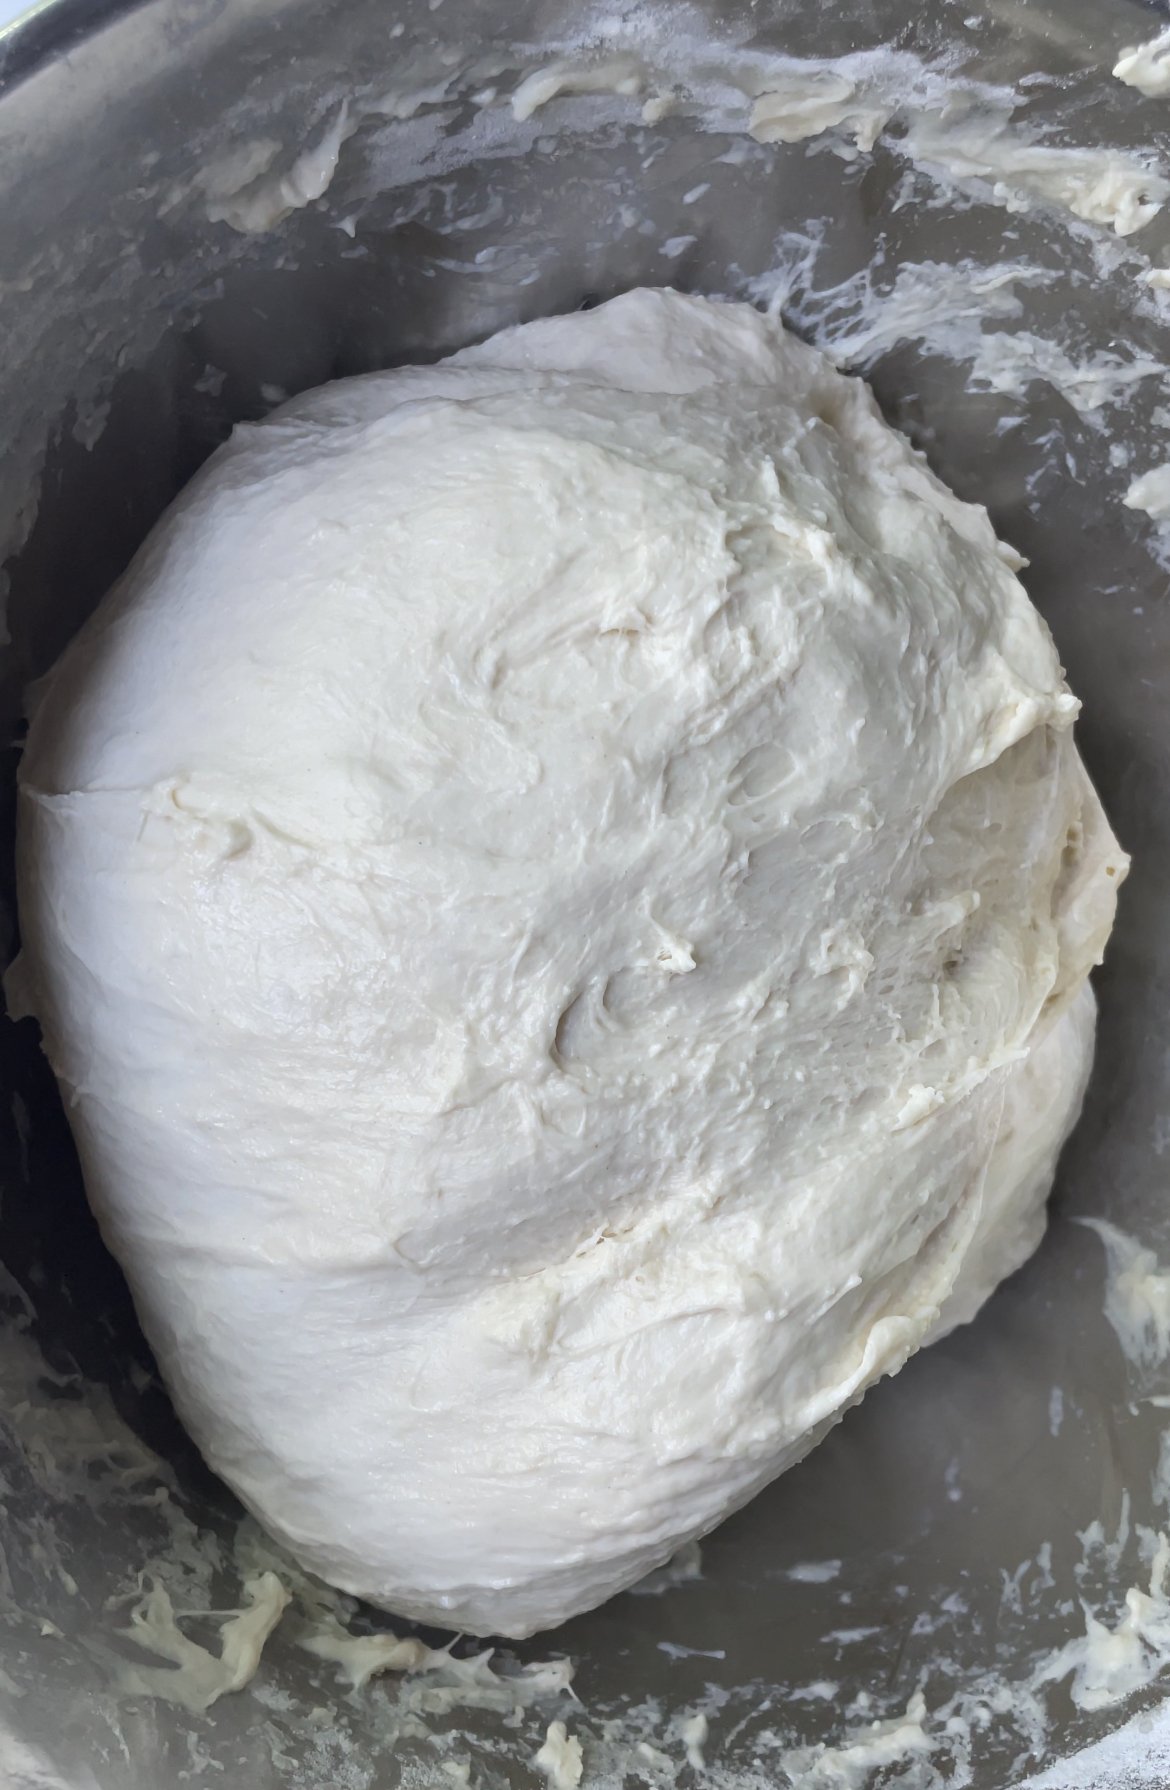
Long Rise: Now for the long rise, which will be be about four-five hours from initial mixing of the dough. You will know it’s done because you will just start to see bubbles develop on top of the dough. If there are lot of large bubbles, you may not need as long of a second rise. Aim for a max of 8 hours from initial mixing of the dough by the time you bake.
If you are making the dough ahead of time: Instead of placing in a pan for the second rise, place the dough in a plastic bag and freeze. Thaw overnight in the fridge or on the counter for 3 hours and then place in the prepared pan for a 3-4 hour rise (likely on the longer side since the dough will need time to warm up).
Second Rise: Prepare your pan by coating with 3-4 tablespoons of olive oil. Add the dough and cover with a dish towel to rise for a minimum of 2 and up to 4 hours. If you are planning to use as sandwich bread, I like to remove about 200 grams of dough from the pan (1/2 cup) and save it for pizza dough. That way, the dough doesn’t come out so thick that it’s hard to eat it all in one bite. Once the dough starts to develop a few bubbles and spread out to the edges of the pan, it is ready to bake.
Add toppings and bake: Set a rack in the middle of your oven and preheat to 450. Drizzle another 1/4-1/3 cup of olive oil over the top and add flakey sea salt and any other desired toppings. Create dimples in the dough by pressing down gently with the tips of your fingers. Bake in the oven for 25 minutes until golden brown all over. Check the bottom in the last couple of minutes and move to the lowest rack if hasn’t browned. Bread will temp at 205°F when fully cooked. Let cool 30 minutes before cutting.
Store in a plastic bag for up to 3 days.

Fluffy Focaccia Bread
Ingredients
Instructions
- Mix the dough: Use a food scale if you have one for the most accurate result. Whisk flours, salt, and yeast (unless you’re using active dry yeast, then activate it first in one cup of the water) in a large bowl. Add water and mix with a fork. When it’s mostly combined, wet your hand and use it to grab underneath the dough and mix until you can’t find any dry flour at the bottom.
- Hydrolyze: Once it’s fully mixed, cover with a dry lint-free towel and let it hydrolyze for 25-30 minutes.
- Fold: Now you will begin folding the dough to build tension. Grab underneath the dough and pull to the opposite side of the bowl. Turn the bowl a quarter of the way clockwise and repeat three more times, turning the bowl after each fold. You will rest the dough and repeat this process three more times for a total of four folds. Cover with the dish towel in between rests.
- Rest & Fold: Wait 5 minutes and fold.
- Wait 10 more minutes and fold.
- Wait 30 more minutes and fold.
- Long Rise: Now for the long rise, which will be be about four-five hours from initial mixing of the dough. You will know it’s ready because you will just start to see bubbles develop on top of the dough.
- Second Rise: Prepare your pans (one 9x13 inch or two 9x9 inch pans) by coating with 3-4 tablespoons of olive oil. Add the dough and cover with a dish towel to rise for a minimum of 2 and up to 4 hours. Once the dough starts to develop a few bubbles and spread out to the edges of the pan, it is ready to bake.
- Add toppings and bake: Set a rack in the middle of your oven and preheat to 450. Drizzle another 1/4-1/3 cup of olive oil over the top and add flakey sea salt and any other desired toppings. Create dimples in the dough by pressing down gently with the tips of your fingers. Bake in the oven for 25 minutes until golden brown all over. Check the bottom in the last couple of minutes and move to the lowest rack if hasn’t browned. Bread will temp at 205°F when fully cooked. Let cool 30 minutes before cutting.
- Store in a plastic bag for up to 3 days.
Notes
Use a scale to measure the flours for the best results.
If you only have active dry yeast, activate it in one cup of the water you plan to add until frothy before mixing into the dough.
If you are planning to use as sandwich bread, I like to remove about 200 grams of dough from the pan (1/2 cup) and save it for pizza dough. That way, the dough doesn’t come out so thick that it’s hard to eat it all in one bite.
If you are making the dough ahead of time: Instead of placing in a pan for the second rise, place the dough in a plastic bag and freeze. Thaw overnight in the fridge or on the counter for 3 hours and then place in the prepared pan for a 3-4 hour rise (likely on the longer side since the dough will need time to warm up).


